
If your driveway is cracked, faded, or worn down, asphalt resurfacing can restore a smooth surface, boost curb appeal, and extend its life by 10–20 years, without the cost of full replacement.
At Betz Works, we’ve resurfaced driveways across Santa Cruz and Monterey Counties for decades and have seen firsthand how it can prevent minor damage from turning into expensive repairs.
In this guide, you’ll learn what driveway resurfacing is, how to do it, and when it’s time to call a paving professional like Betz Works.
Key Takeaways
- Driveway resurfacing involves adding a new, protective layer over your existing driveway to restore its appearance and functionality.
- To resurface your driveway, start by cleaning the surface, then fill the cracks, apply primer or track coat, lay the new asphalt or specialized resurfacing agent, compact it, and let it cure for 24 to 48 hours.
- If you notice your driveway cracking, crumbling, or developing potholes, call Betz Works for expert driveway repair, resurfacing, or replacement: 831-400-8466
What is Driveway Resurfacing?
Driveway resurfacing is the process of applying a new layer of material, typically asphalt, over an existing driveway to restore its appearance and improve its performance without completely replacing the structure.
When and How Often Should You Do It?
How often you need driveway resurfacing depends on a number of factors, including traffic levels, how well the driveway has been maintained, and the weather.
Since our area periodically experiences strong storms and heavy rainfall, this can create drainage issues that require more frequent resurfacing.
You should monitor the surface for growing cracks, fading, or minor deterioration, which are all signs that you’ll need to resurface your driveway soon.
What Are the Benefits of Driveway Resurfacing?
Having a smooth, restored asphalt driveway provides multiple benefits. Not only does it boost curb appeal, but it also extends the lifespan of your driveway.
For homeowners throughout Central Coast communities such as Santa Cruz County and Monterey County, resurfacing can be especially valuable because coastal conditions like sun exposure, moisture, and temperature fluctuations can gradually wear down asphalt surfaces.
Pros
- Cheaper than replacement
- Adds years to asphalt’s lifespan
- Boosts curb appeal
- Increases property value
- Eliminates safety hazards
Cons
- Ineffective for structural damage
- Not a permanent solution
- Requires specific weather conditions
- Potential issues with color matching
How Much Can You Expect to Pay?
Driveway resurfacing is generally much more affordable than a full driveway replacement because the existing base and most of the original pavement remain in place.
Costs typically depend on the driveway’s size, current condition, and whether repairs are needed before the new layer is installed.
Quick Tips Before You Start
Choose the Right Weather
Pick a warm, dry day with temperatures above 50°F and no rain expected for at least 48 hours. You give the material the right conditions to cure properly and avoid weak or uneven results.
Wear Safety Gear
Protect yourself by wearing gloves, long sleeves, eye protection, and sturdy shoes. You reduce your risk of burns and irritation from hot asphalt and chemical sealants.
Check Your Driveway’s Condition First
Look closely at the surface before you begin. If you see widespread damage, sinking areas, or major cracks across more than 30% of the driveway, you will likely need full-depth repairs or a complete driveway replacement instead of resurfacing.
How to Resurface Your Asphalt Driveway
1. Clean the Driveway
Start by cleaning the surface of your driveway.
This ensures that you don’t trap dirt, debris, and other contaminants between the new surface and the existing asphalt.
You’ll need a few tools, including:
- Pressure washer
- Wire brush
- Leaf blower
2. Repair the Damage
If your driveway has cracks that are larger than ¼” in diameter or potholes, you can use cold patch asphalt or crack filler to fill them in.
You’ll need:
- Cold patch asphalt or crack filler
- Putty Knife
- Hand tamper
Pour the cold patch asphalt or crack filler into the cracks and potholes, and even it with a putty knife. Then, aggressively compact the material in the crack.
Pro tip: Make sure that you create a level surface with the new material and the existing asphalt around it to prevent any ridges in the surface.
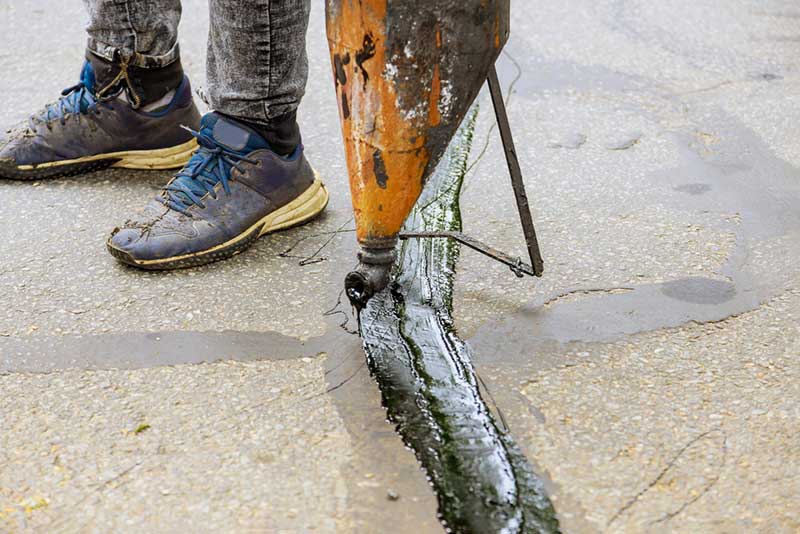
3. Apply Primer or Tack Coat
Before applying the new asphalt, you’ll need primer or tack coat.
This bonding agent helps the new asphalt adhere properly to the old pavement, creating a strong connection between the layers.
Without this step, the new asphalt may not bond evenly, which can lead to premature separation or surface failure.
To get a professional-grade layer of primer applied, you’ll need the right tools, including:
- Personal protective equipment (PPE)
- Sprayer
- Squeegee or asphalt brush
Apply a thin, even layer of the primer or tack coat to the surface. Once the solution is in place, use the squeegee or brush to spread the solution across the surface.
4. Pour New Asphalt
With the surface thoroughly cleaned and prepared, you’re ready to resurface your asphalt driveway.
To do this, pour the new asphalt onto the surface and spread it evenly. To get an even spread, you’ll need:
- Squeegee
- Shovel
- Lute
Carefully pour a layer of new asphalt that’s between 1.5” and 2” thick over the area that you’ve placed the tack coat.
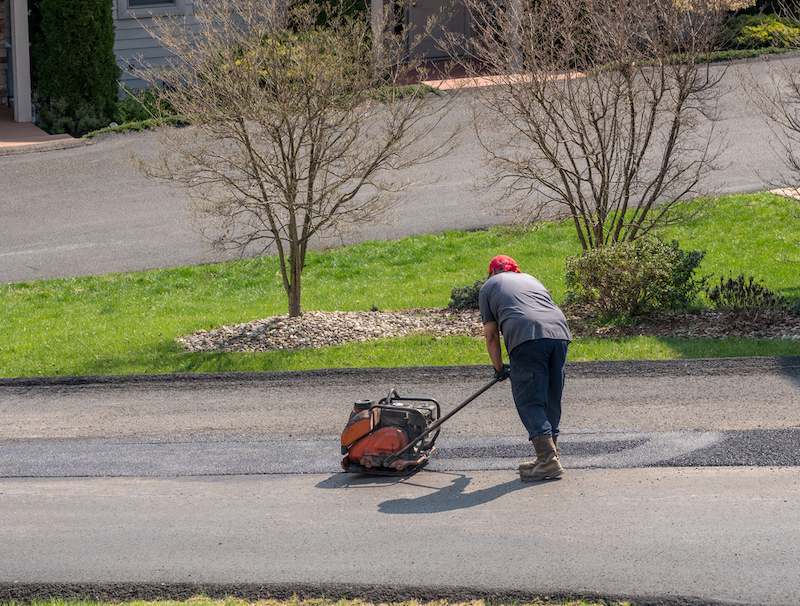
5. Compact the Asphalt
With the new asphalt in place, you need to compact it.
This prevents air bubbles from forming beneath the new surface. It can also protect against moisture and debris that can lead to new cracks and potholes forming.
To make sure that the surface is evenly and adequately compacted, you’ll need to use specialized tools, such as a lawn roller or plate compactor.
Firmly and evenly press the tool that you choose into the new asphalt, creating a smooth, flat surface.
Pro tip: Use a smaller compactor to smooth out the material that the larger tools can’t reach, such as near the garage door or along the edge of the driveway.
6. Let it Cure
You should avoid driving on the new surface for 24 to 48 hours after you’ve finished the process.
However, this timeframe may vary based on the thickness of your new surface coating and the weather.
Thicker layers of asphalt take longer to cure. Also, if you resurface your asphalt driveway while it’s warm outside, it will cure faster.
We recommend that you wait somewhere between 6 and 12 months before applying sealcoating to the surface.
This not only gives the asphalt time to cure but also allows oils to release, transforming it from a pliable surface into a rigid, durable one.
When to Resurface vs. Replace
Resurface if: the damage to your asphalt driveway is limited to the surface.
If the foundational layers are still in good condition, the issues likely don’t extend far beyond the surface.
If the asphalt has minor cracking, light surface wear, fading, or small depressions, a new layer of asphalt can restore the driveway’s appearance and performance without the cost of a full replacement.
Replace if: the driveway has major structural problems.
Severe potholes, multiple deep cracks, issues with drainage, and areas of crumbling pavement generally point to problems with the substrate. In these situations, simply covering the surface with new asphalt will not solve the underlying issue.
Removing the old driveway and rebuilding the base ensures the new asphalt has a solid foundation and will last for many years.
When to Call Betz Works

In some instances, resurfacing the driveway on your own isn’t the best option.
If you notice any of the following signs, Betz Works can help repair, resurface, or replace your driveway:
- The cracks in your driveway are spreading across the surface
- You’ve noticed potholes and worn areas forming in different parts of the driveway
- The driveway is crumbling, fading, and showing other signs of deterioration
- Drainage problems are impacting the driveway
- You want to extend your driveway’s lifespan without investing in a full-scale replacement
We understand how Central Coast weather events, temperatures, and other factors impact your asphalt, and we will work with you to choose the best option for your property.
Call today to request a free quote: 831-400-8466
FAQs
How long does it take to resurface an asphalt driveway?
Most residential asphalt driveway resurfacing projects can be completed in one day.
The process typically includes cleaning the surface, making minor repairs, applying a bonding agent, and installing the new asphalt layer.
After installation, the driveway usually needs 24 to 48 hours to cure before vehicles can drive on it.
Can I resurface a driveway myself?
While some homeowners attempt DIY resurfacing using patching products or resurfacing compounds, professional resurfacing requires specialized equipment and proper asphalt installation techniques.
Contractors use tools such as asphalt spreaders, rollers, and tack coat sprayers to ensure the new layer bonds correctly and compacts evenly.
While you can perform some resurfacing tasks yourself, trusting a paving professional generally provides a longer-lasting solution.
What is the best material to resurface a driveway?
Hot mix asphalt is generally considered the best material for resurfacing an existing asphalt driveway.
It creates a durable, smooth surface that bonds well with the existing pavement when installed properly.
Hot mix asphalt also holds up well against vehicle traffic and temperature changes.
In some cases, contractors may also use specialized asphalt overlays or sealcoating products depending on the condition of the driveway.