310A Kennedy Dr Capitola, CA 95010
Phone: 831-400-8466
Email: allan@betzworks.us
License Number: 1098361
Phone: 831-400-8466
Email: allan@betzworks.us
License Number: 1098361

Daily wear and tear and exposure to the elements break asphalt down over time, leading to cracks, drainage issues, potholes, and more.
Fortunately, by regularly sealing your driveway, you can:
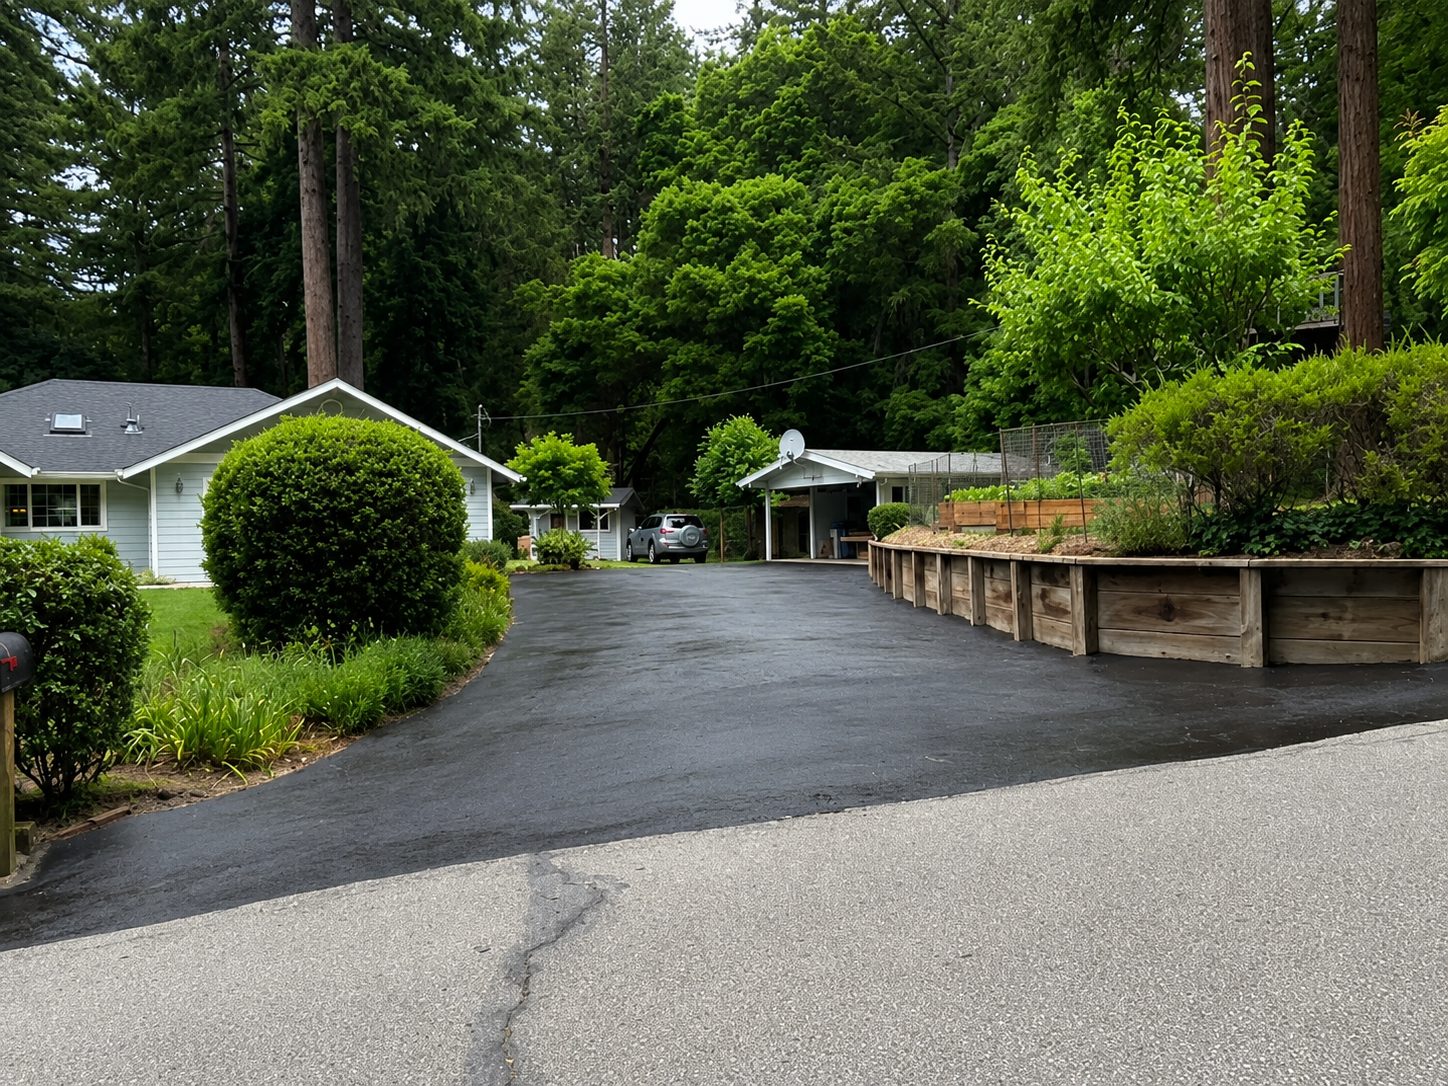
Betz Works provides driveway sealing services for customers in and around Santa Cruz, Monterey, and Santa Clara Counties.
Whether you have a small driveway or a long lane leading to your home, our team will provide the sealing and maintenance services needed to protect and enhance it.
If you’ve noticed light spots in your asphalt surface, that’s a sign that the asphalt is wearing out and should be sealed to prevent further damage.
When we seal driveways, we add a sacrificial layer of material that absorbs the force of vehicle traffic, wear and tear from the elements, and corrosion from vehicle fluid leaks.
Replacing and replenishing this coating every 3-5 years extends the lifespan of the foundational asphalt surface and helps your driveway stay in good shape.
We back our driveway sealing services with a 1-year warranty for peace of mind.
Contact us today at 831-400-8466 to learn more about our services or to request your free estimate.
Before we begin work on your driveway, we conduct a site visit.
During this visit, we evaluate your driveway surface and determine which seal coating service you need.
Sealcoating, in general, is most applicable for parking areas and residential and commercial parking lots.
Type 2 sealing, on the other hand, involves an emulsion of granite aggregate and water for roadways and pass-through traffic.
Once we’ve finished our site visit and inspection, we’ll provide a free estimate for the driveway sealing cost.
Once you’ve approved the estimate, we’ll schedule the project at a time that works for you and your family.
Next, we’ll prepare your driveway by cleaning the asphalt with brooms and blowers to remove all surface debris.
This ensures a smooth seal and extends the lifespan of the protective layer.
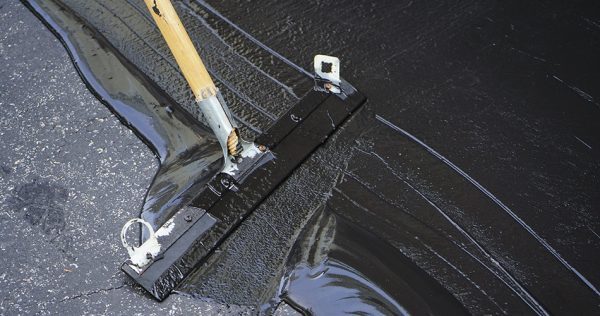
Once the driveway is clean and prepared, we apply the seal coat to your entire asphalt surface.
After we’ve applied your seal coat, we’ll barricade your driveway to prevent vehicle traffic and allow your seal coat to cure completely.
We’ll also add signage to keep cars and pedestrians off the surface.
Once we’ve finished sealing your driveway, we’ll evaluate the finished product with you to ensure you’re 100% satisfied with the work.
Our job isn’t complete until you’re happy with the outcome!
Sealing your driveway is an important job. Here’s why your friends and neighbors trust our team to do it:
Get in touch with us for the following:
Ready to learn more about our team and how we can help you? Contact us today at 831-400-8466 or complete our online form to request a free estimate!
Pedestrian traffic is allowed after 2-3 hours, but vehicle traffic should stay off the sealed surface for 24 hours.
In most cases, one coat is sufficient. If your driveway hasn’t been sealed within the last five years, however, two coats would be recommended.
Driveways need to be seal-coated every 3-5 years.
Set yourself up for success by doing these things before you begin the asphalt sealing process:
It’s crucial to choose a dry, warm day to seal an asphalt driveway.
Opt for a weather window with no rain forecast for at least 48 hours and temperatures between 60 and 90 degrees Fahrenheit, which are ideal for curing.
If you live in an area with lots of morning dew or fog, plan to stop the sealcoating process by 3 pm, so it doesn’t wash off with the next morning’s moisture.
Here’s a list of the essentials you’ll need to seal your driveway:
While a DIY approach to sealing your driveway can be cost-effective and satisfying, it’s not always the best idea.
If you have a large driveway or a driveway with large cracks, sinkholes, or lots of damage, hiring a professional will ensure a more even application and better long-term results.
Follow this step-by-step guide to seal your driveway like a pro:
Before sealing your driveway, the surface needs to be completely clean and prepared. Driveway sealer will not bond to asphalt that’s dirty or covered in debris.
How to do this:
Applying sealant may seem intimidating, but it’s easier than you might think.
Here’s how to do it like a pro:
Now that you’ve applied the sealant, you need to allow it to dry.
Here are a few tips:
Steering clear of these common mistakes can make the difference between a successful project and a do-over:
The best way to protect your investment and increase the time between seal coats is to maintain the driveway surface once you’ve sealed it. Here’s how:
We recommend waiting at least 6-12 months before sealing a new asphalt driveway. This allows the asphalt sufficient time to cure and harden.
Additionally, we recommend allowing asphalt repair products like crack and pothole fillers to cure for six months before you seal your driveway.
Sealing an asphalt driveway serves multiple purposes: First, it provides a protective layer that safeguards the asphalt from harmful UV rays and damaging substances like oil and gasoline.
Second, it helps prevent water from seeping into the pavement, which can lead to freeze-thaw damage in colder climates.
Third, it enhances the appearance of your driveway by giving it a fresh, clean look.
With these things in mind, it’s easy to see why sealing your driveway is a beneficial practice that extends the life of your asphalt driveway, saves long-term repair costs, and improves your property’s curb appeal.
The best driveway sealant for your purposes depends on the specific needs of your driveway and the climate in your region. That said, acrylic resin-based sealers are popular due to their durability, longevity, and superior color enhancement properties.
Another strong contender is coal-tar sealants, known for their resistance to water, oil, and UV damage. However, it’s crucial to note that they are more toxic and banned in some regions.
Lastly, asphalt-based sealants are popular for their ease of application and low cost. Remember to consider your specific situation and conduct adequate research before deciding on the best sealant for your driveway.