
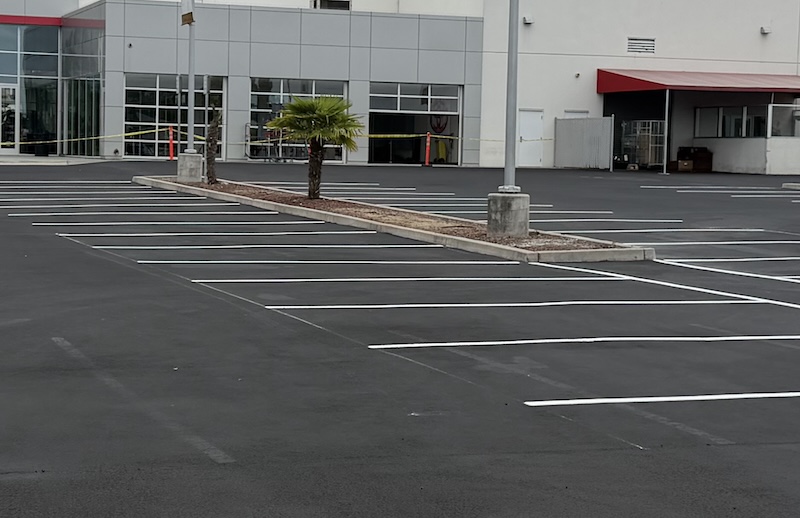
If you manage a commercial property, proper parking lot striping is one of the most important steps you can take to improve the safety and appearance of your lot.
At Betz Works, we’ve been paving and striping parking lots across Santa Cruz, Monterey, and Santa Clara Counties for decades.
Here’s our complete guide to doing it right.
Key Takeaways
- Parking lot striping keeps your property safe, organized, and compliant while improving curb appeal.
- To stripe a parking lot, prepare the surface, plan the layout, choose the right paint and equipment, apply the lines, let them dry, and add finishing details.
- Call Betz Works for expert commercial parking lot maintenance and striping services in Santa Cruz, Monterey, and Santa Clara Counties: 831-400-8466
What is Parking Lot Striping?
Parking lot striping defines how vehicles move and park within your lot.
It includes painted lines, directional arrows, curbs, and ADA markings that organize traffic and improve safety.
To keep your parking lot safe and compliant, schedule striping at the right times:
- After new paving or sealcoating – to establish clear traffic patterns
- Every 12–24 months – or sooner if paint fades or chips
- When regulations change – to stay Americans with Disabilities Act (ADA) compliant
The benefits of proper striping include:
- Improves driver and pedestrian safety
- Maximizes parking efficiency
- Keeps your lot compliant with local and federal codes
- Gives your property a clean, professional appearance
A Step-by-Step Guide to Parking Lot Striping

Step 1: Prepare the Surface
Before you start striping, your parking lot must be clean, dry, and in good condition.
- Repair cracks and potholes. Fill and seal damaged areas so paint adheres evenly.
- Clean thoroughly. Remove debris, oil, and dirt using a blower or pressure washer.
- Allow drying time. Paint won’t stick to wet surfaces, so schedule striping during a warm, dry day.
Pro Tip: The best time to stripe is immediately after sealcoating your parking lot, typically once per year.
Step 2: Plan the Layout
A good layout balances safety, efficiency, and compliance.
- Follow ADA requirements. Reserve accessible spaces near entrances and mark them clearly with blue paint and symbols.
- Measure carefully. Parking space dimensions vary, but here are some average dimensions in the U.S.:
- Standard spaces: 9 feet wide x 18–20 feet long
- Compact spaces:5–8.5 feet wide x 15–17 feet long
- Accessible spaces: 8 feet wide (11 feet for vans) with a 5-foot access aisle
- Parallel spaces:5–9 feet wide x 20–24 feet long
- Account for traffic flow. Use directional arrows, fire lanes, and loading zones to keep vehicles moving safely.
Pro Tip: Use chalk lines or temporary paint to outline the design before applying permanent striping.
Step 3: Choose the Right Paint
The type of paint determines how long your stripes last and how visible they are.
- Water-based acrylic paint: Dries quickly, environmentally friendly, and ideal for California’s climate.
- Solvent-based paint: More durable for high-traffic areas but requires proper ventilation.
Use bright, high-visibility colors:
- White for standard parking spaces
- Blue for handicapped areas
- Yellow for no-parking zones and loading areas
Step 4: Select the Right Equipment
For professional-quality results, you’ll need:
- A striping machine suited to your paint type
- Stencils for symbols and directional markings
- Measuring tools for even spacing
- Safety gear for workers and cones to block off the area
Professional striping machines produce crisp, uniform lines that look cleaner and last longer than DIY spray applications.
Step 5: Apply the Paint
Use a striping machine for straight, even lines. Align the spray gun with your chalk line and move at a steady pace, similar to pushing a lawnmower.
Practice your motion first to avoid uneven coverage.
Keep tire pressure slightly lower on the caster wheel for smoother lines.
For small areas, use a 4-inch roller or spray wand for precision.
Pro Tip: Choose a day between 45°F–85°F with dry conditions. This helps the paint cure evenly and prevents peeling or tracking.
Step 6: Let it Dry and Add Finishing Touches
Allow the paint to dry completely, typically 30–60 minutes for water-based paints under ideal conditions.
Keep the lot closed to vehicles for at least 24 hours to let the paint fully cure.
Inspect the entire lot for missed spots, uneven lines, or faded areas. Touch up as needed.
Once the main striping has dried, paint arrows, stop bars, crosswalks, and other traffic symbols following MUTCD standards.
When everything is completely dry, you can install parking blocks, wheel stops, or speed bumps as needed.
How to Keep Your Parking Lot Lines Looking Great
- Schedule restriping every 1–2 years, depending on traffic.
- Sweep and clean regularly to prevent buildup and fading.
- Repaint after every sealcoat or major pavement repair.
- Inspect for cracks that could distort or obscure lines.
Why Hire Betz Works for Parking Lot Striping Instead of DIY?
While DIY parking lot striping might seem cheaper upfront, it often leads to uneven lines, premature fading, or noncompliance with ADA and fire lane standards.
Hiring a professional striping contractor like Betz Works ensures:
- Accurate layouts that meet state and local codes, such as:
- High-quality paint that lasts
- Minimal business disruption
- A polished, professional finish that reflects well on your property
Trust Betz Works for Expert Parking Lot Striping
When it comes to parking lot striping on the Central Coast and in Santa Clara County, Betz Works delivers the quality and precision your property deserves.
We’ve spent decades helping commercial property owners from San Jose to Carmel maintain and stripe parking lots that are safe, compliant, and built to last.
From layout planning to final inspection, we handle every detail.
Contact us today to request a quote or schedule your next parking lot restriping service: 831-400-8466
FAQ
How often should I stripe my parking lot?
Every 12–24 months, or whenever the lines start to fade. High-traffic lots may need annual restriping.
How long does parking lot paint last?
Typically 1–2 years, depending on paint type, weather, and traffic volume.
Can you stripe concrete parking lots?
Yes. Concrete can be striped using the same techniques and paint types designed for durable adhesion.
How much does professional parking lot striping cost?
The cost of parking lot striping can vary widely depending on several factors, including the size of the lot, the number of parking spaces, the complexity of the layout, and the type of paint used.
On average, the cost to stripe a parking lot can range from $0.25-$1 per linear foot for freshly painted lines. Re-striping existing lines tends to be on the lower end of this range, while prices for new layouts may be higher due to additional planning and marking required.
Special markings for handicapped spaces, arrows, and custom logos may also increase the overall cost.
How should I handle parking during a striping project?
Before striping begins, you should temporarily relocate parking to another area.
This prevents interruptions to your business operations and keeps vehicles and pedestrians safe while work is in progress.
Always communicate the schedule ahead of time to employees, customers, and nearby businesses so everyone knows where to park and when the lot will reopen.
How long does it take to stripe a parking lot?
The duration to stripe a parking lot typically depends on several factors, including the size of the parking lot, the complexity of the layout, the condition of the surface, and weather conditions.
For a standard parking lot, re-striping can usually be completed in a single day, assuming optimal conditions and preparation.
However, if the project involves a new layout, extensive surface preparation, or custom markings, it may take several days.
Efficient planning and clear communication with the contractor will help ensure that the project is completed as quickly and smoothly as possible.
How long does it take for parking lot paint to dry?
The drying time for parking lot paint can vary significantly based on the type of paint used, the thickness of the application, and environmental conditions.
Water-based paints, commonly used for parking lot striping, typically dry to the touch within 30 minutes to an hour under ideal conditions (70°F with low humidity).
However, for the paint to fully cure and withstand vehicle traffic, a waiting period of at least 24 hours is often recommended.
Oil-based paints may require a longer drying time, depending on specific product formulations and weather conditions.
It’s crucial to check the manufacturer’s specifications for the paint being used and consider local weather patterns when planning the striping project to ensure the best results and longevity of the markings.
How thick is parking striping?
The thickness of parking lot striping plays a pivotal role in both the visibility and durability of the markings.
Standards for line thickness can vary, but the typical range for parking lot lines is about 4″ wide and 15″-18″ long.
This specification ensures that the stripes are visible enough to drivers and pedestrians to maintain safety and order within the parking lot while also providing a level of wear resistance suitable for the level of traffic most commercial lots receive.